
How To Install Your Hearing Loop Kit
Below are the installation instructions for a typical residential hearing loop kit:
< Installation
1. Strip 1/4” of wire casing from both ends of the wire roll
2. Place the amplifier within 6’ of the sound source (TV, Stereo, etc.)
3. Starting at the amplifier, lay the wire in a loop around the perimeter of the room/area, ending at the amplifier (use all of the wire included on the spool of the kit, any excess can be left on the spool)
4. Insert stripped ends of the wire into the back of the loop amplifier
5. Connect Patch Cable to “Audio Out” or “Line Out” from the sound source and the back of the amplifier (plugs are color coded red & white or it could be a 3.5mm plug)

6. Note: Some new TV’s may only have a digital “audio out” in which case either use an alternative shown above (cable box) or use a digital to analog converter (DAC)
7. Connect the power supply to the amplifier and to a power source (120V outlet)
8. Turn on the sound source (TV, Stereo, etc.)
9. Plug in the amplifier – a blue light will turn on
10. Switch your hearing aid to T-coil (T/MT)
11. The sound source will be transmitted directly to your hearing aid – if this is not the case, go to “Troubleshooting”
Wire Installation Options:
- Place underneath the carpet
- Place underneath the baseboard
- Place around a drop ceiling – for amplifying the room below
- Place around the attic floor – for amplifying the room below
- Place in the basement ceiling – for amplifying the room above
- Wire must be 1-2 meters above or below the hearing aid level (adults generally sit 1.2-1.4 meters tall)
Troubleshooting your loop
| Problem | Solution |
|
|
|
|
|
|
|
|
|
|
|
|
How-to
Below is an overview of a commercial hearing loop project process:
Design:
- Review dimensions of the area to be looped and the distance to the sound source
- Areas to be included and excluded (eg. church aisles),
- Determine construction materials and the floor covering at the site (metal content),
- Determine a likely wire location (eg. on or under the floor, in the ceiling),
- Develop a design(s) that will likely provide a strong, consistent signal with no dead spots.
Equipment:
- Determine the length, gauge, and type(s) of wire,
- Specify the size of amplifier based on the resistance and size of the loop,
- Other sound equipment required (loop receivers, microphones, mixers, etc.)
Pre installation tests:
- Walk around the room with a Field Strength Meter (FSM), a t-coil activated, or a Loop Receiver to listen for hums and buzzes. (A small amount of hum is common and will fade in the background when the loop is used.) Likely sources are old lighting, wiring, dimmer switches, etc.
- Test the loop design by laying round wire on top of the floor, connect the amplifier, the sound source, and all other electrical equipment.
- Test for a strong, consistent signal in all areas (no dead spots.)
- Make adjustments to the design.
Wire installation:
- Under carpeting (need to splice and re-attach),
- Between tiling (need to remove grout, install wire, and re-grout)
Install the loop and test.
Commission the loop by measuring the key criteria of the IEC Standards with the FSM
How-to
Below is a summary of the IEC Hearing Loop Standards:
Background:
The generally accepted standard published by the International Electrotechnical Commission is the IEC 60118-4 revised in 2006
This standard provides measurable parameters for installed loops to cover:
- Field Strength – strength and consistency of loop signal
- Capable of 400mA/m RMS with 1kHz sine
- Variation ≤ ±3dB over the required volume of use
- Frequency Response – flat response at different frequencies
- Field strength variation ≤ ±3dB from 100Hz to 5kHz over the required volume of use (referenced to the level at 1kHz)
- Background Noise – maximum acceptable levels
- A-weighted background noise to be < 32dB relative to the signal (400mA/m RMS)
- Ideally < 47dB where possible
- Subjective Test – to ensure the system provides and undistorted clear signal
- Ideally hearing aid users will validate
The Standard: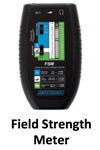
- Is not enforceable, however , the consumer can request compliance results as part of the purchase contract
- Does not cover the placement of wire or resulting appearance
- Does not cover the installation of equipment
- Does not require the certification of installers